Prevent Ice Dams in St. Louis: 6 Essential Steps to Avoid Damage
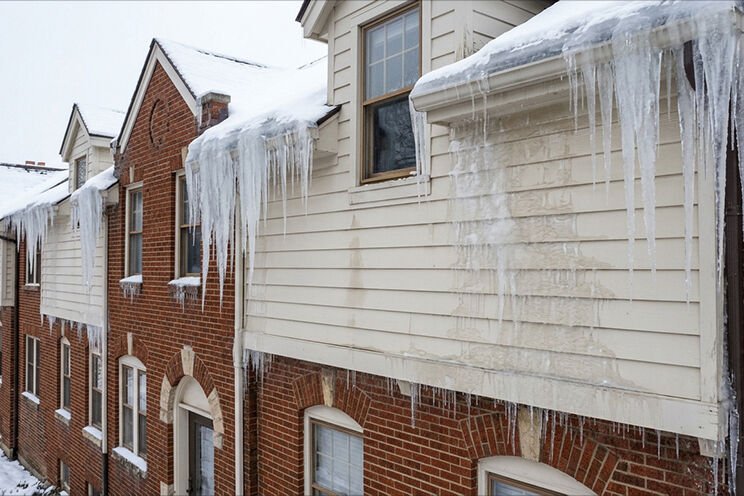
If you want to prevent ice dams on your St. Louis home, start in the attic, not on the roof. A ridge of ice along the eaves looks like a roof problem, but it is almost always a heat problem.
Once a ridge forms, meltwater backs up under the shingles and drips into your ceilings and walls. The damage can show up long before you spot the ice.
This guide explains why ice dams are common here and gives you six ways to stop them, with the best timing for each. It also covers what to do if a dam has already formed.
#why-ice-dams-are-common-in-st-louis { font-size: 20px !important; }St. Louis rarely settles into steady cold. A snowy morning is often followed by a sunny afternoon above freezing, then a deep freeze overnight. Each swing gives snow a chance to melt and refreeze.
Here is how an ice dam forms:
- Heat escapes from your living space into the attic.
- The warm roof deck melts the snow sitting on top of it.
- Meltwater runs down to the eaves, which stay colder because no heated rooms sit below them.
- The water refreezes into a ridge of ice.
- New meltwater pools behind the ridge and creeps under the shingles.
Older homes are especially prone to this. Brick bungalows, two-story houses, and homes with finished attic rooms often have thin insulation or hidden gaps near knee walls and chimneys. Those spots let heat leak out all winter long.
6 Ways to Prevent Ice Dams Before Winter
Work through these in order. Each step builds on the one before it.
1. Seal Air Leaks in the Attic Floor
Best time: early fall, on a mild day.
Air sealing is the best place to begin. Warm air slipping through small gaps heats the roof deck from below, and insulation alone will not stop it.
Take a flashlight into the attic and look for gaps around:
- Wires and pipes that pass through the ceiling
- Recessed light fixtures
- The attic hatch or pull-down stairs
- Chimneys and furnace flues
- Dropped ceilings above kitchen cabinets
Use caulk for small gaps and expanding foam for larger ones. Furnace flues get very hot, so they need fire-rated materials instead of ordinary foam. The ENERGY STAR attic air sealing guide explains safe materials and methods, including the basics of working safely in an attic.
2. Add Insulation Over the Sealed Floor
Best time: right after sealing.
Once the leaks are closed, add insulation to slow the heat that remains. Even coverage matters. Thin patches let heat through and create warm stripes on the roof where snow melts first.
If you can see the tops of your ceiling joists, you probably need more. The ENERGY STAR attic insulation guide covers how to add it, and ENERGY STAR publishes recommended R-values by climate zone, so check the target for the St. Louis area before you buy materials.
3. Keep Soffit and Ridge Vents Open
Best time: while you are already in the attic.
A cold roof deck does not melt snow. Ventilation helps by pulling outside air in through the soffits at the eaves and pushing it out near the ridge.
However, insulation often ends up stuffed against the soffits, which blocks that airflow. Rafter baffles hold the insulation back and keep a clear channel open. The Insulation Institute’s ice dam guide explains why sealing, insulation, and ventilation work best together. If your attic has few vents, ask a roofer to review the layout before adding more.
4. Send Exhaust Fans Outdoors
Best time: during the same attic visit.
A bathroom fan that ends inside the attic dumps warm, humid air right against the roof deck. That adds heat where you do not want it and can cause mold.
Check where each fan duct ends. It should run through the roof or an exterior wall, not into open attic space.
5. Install an Ice and Water Barrier at the Eaves
Best time: during a roof replacement, before winter.
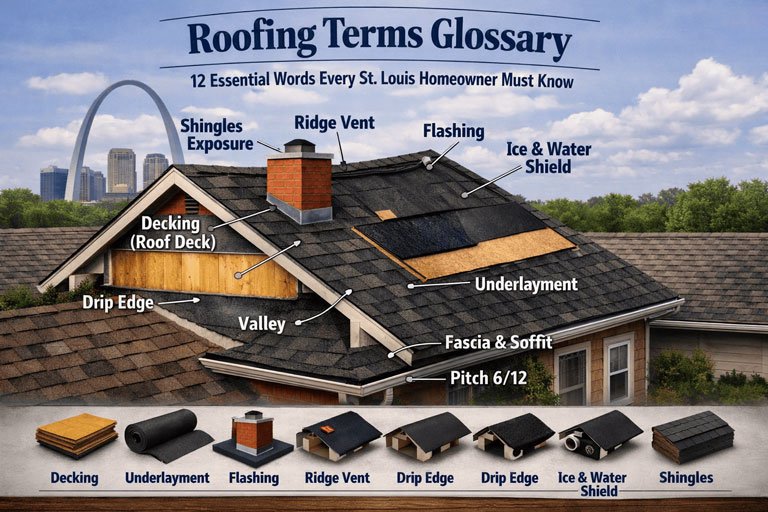
This is a backup layer rather than a cure. A self-adhering ice and water barrier is a waterproof membrane applied under the shingles along the lowest edge of the roof. If water does back up, the membrane helps keep it out of the roof deck and your home.
Ask your contractor whether it is included in the estimate, and confirm the product meets local code and the shingle maker’s requirements.
6. Clear Snow From the Roof Edge After Big Storms
Best time: after each heavy snowfall.
Less snow near the eaves means less water to refreeze. Use a roof rake from the ground to pull snow off the lowest few feet of the roof.
Stay safe while you do it:
- Stay on the ground. Never climb onto a snowy or icy roof.
- Protect the shingles. Choose a rake with a plastic edge or wheels.
- Watch for slides. Stand clear of sliding snow.
- Skip the tools. Hammers, shovels, and rock salt can damage the roof.
Fall Timeline at a Glance
Use this table to plan how you prevent ice dams this season.
| When | What to do | DIY or pro? |
|---|---|---|
| Early fall | Seal attic air leaks | Either, though tight attics favor a pro |
| Right after sealing | Add insulation | Either |
| Same attic visit | Check vents and fan ducts | Usually a pro for new vents |
| Before the first freeze | Plan an ice and water barrier with your roofer | Roofing contractor |
| After leaves drop | Clean the gutters | Either |
| After heavy snow | Rake the roof edge | DIY, from the ground |
Do Gutters and Heat Cables Help?
Clean gutters will not stop an ice dam on their own, because dams start with heat loss in the attic. Still, clogged gutters hold water and ice at the roof edge, so clear them once the leaves are down. Heat cables can keep a drainage path open at a trouble spot, such as a low porch roof, but they treat the symptom and not the cause. To prevent ice dams for good, fix the attic first.
What to Do If an Ice Dam Has Already Formed
Even a careful homeowner can end up with a dam. If water is already seeping in, take these steps:
- Rake the snow off the lowest section of the roof, from the ground.
- Move belongings away from the stain and set out buckets to catch drips.
- Photograph the damage in case you need to file a claim.
- Call a professional, since steam removal is safer for shingles than chipping at ice.
When to Call a Professional
Some situations are best left to an experienced contractor. Call one if:
- Water is already leaking into your home.
- The dam is out of reach. It sits on a second-story roof or any area you cannot reach from the ground.
- It keeps coming back. You tried to prevent ice dams and still get them every winter.
- The attic looks risky. You spot mold, old cloth-covered wiring, or shiny, pebble-like vermiculite insulation, which should be tested before anyone disturbs it.
A contractor can inspect the roof edge, flashing, and shingles and tell you which repairs make sense. Therefore, a quick inspection before winter is often cheaper than a repair in January.
Get Ready to Prevent Ice Dams This Winter
Ice dams are a heat problem more than a roof problem. Seal the leaks, add insulation, keep air moving, and protect the eaves, and you remove most of what causes them.
If you would like a professional to look at your roof edge and attic before the first freeze, reach out to Tulley Contracting Services. Explore our services and request an estimate for your project.
Frequently Asked Questions
When should I prevent ice dams in St. Louis?
Fall is the best time, before the first snow sticks. Attic work is safer and easier in mild weather, and contractors are less rushed.
Does homeowners insurance cover ice dam damage?
Many policies cover sudden water damage from ice dams, but coverage varies by policy and by cause. Report damage to your insurer promptly, and read the United Policyholders guide to ice dams and insurance before you call.
Are icicles a sign of an ice dam?
A few small icicles are normal. Large icicles along the eaves, especially with a ridge of ice behind them, suggest a dam is forming.